| Group 1: Mounts |
| # |
Skill |
Value |
| 1.101 (D) |
Leap onto beam, landing in arabesque position (leg min.
at horizontal) (view ) )
|
A |
|
| 1.201 (D) |
Split leap onto beam (view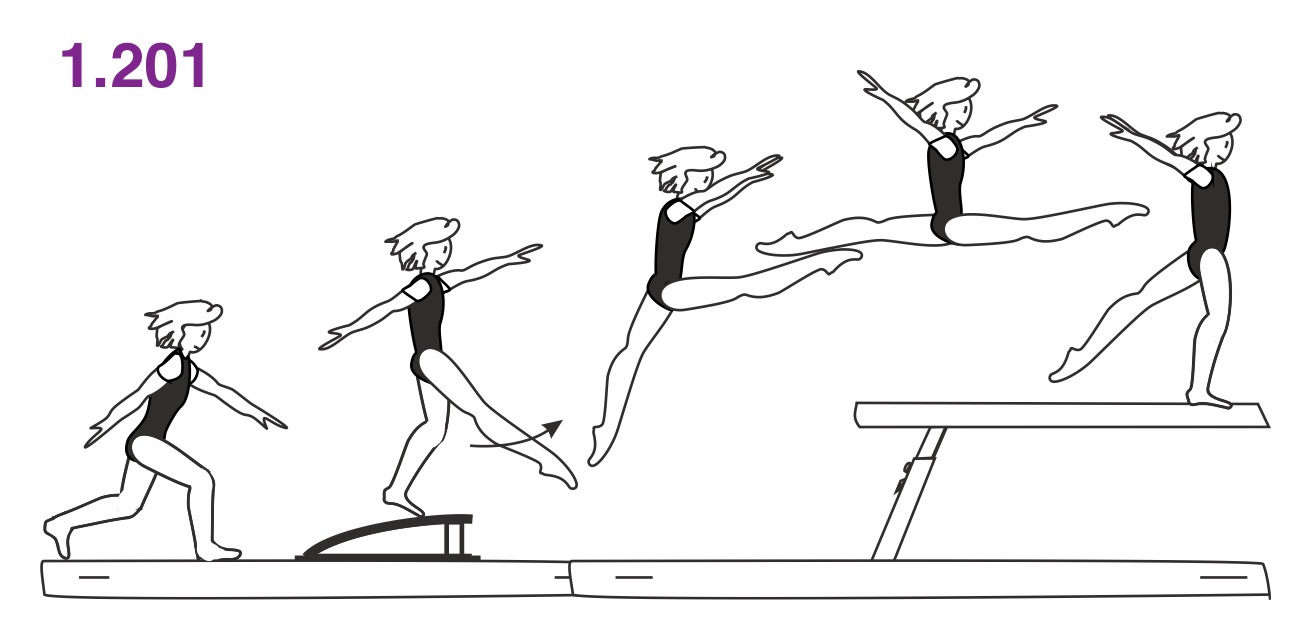 ) )
|
B |
|
| 1.401 (D) |
Switch leg leap onto beam (leap forward to split with leg change) (view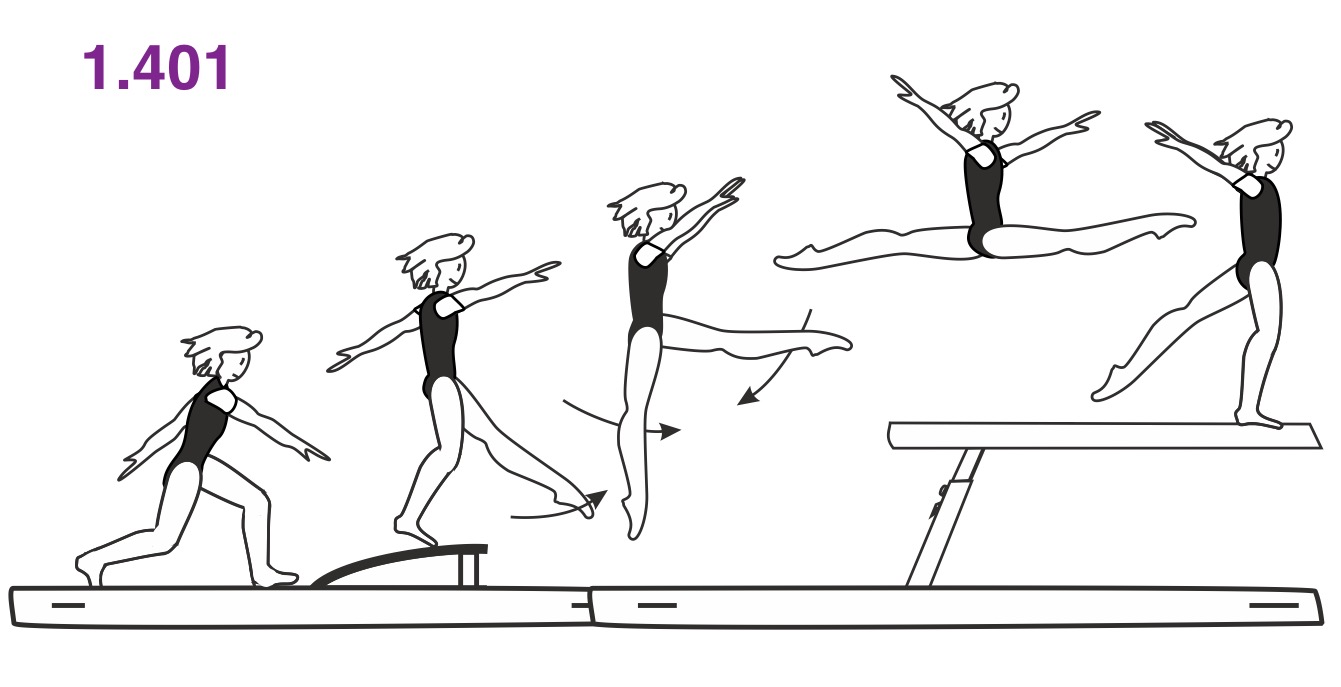 ) )
|
D |
|
| 1.102 (D) |
Thief vault (90° approach to beam, take-off from one leg, free leap over beam, one leg after another) (view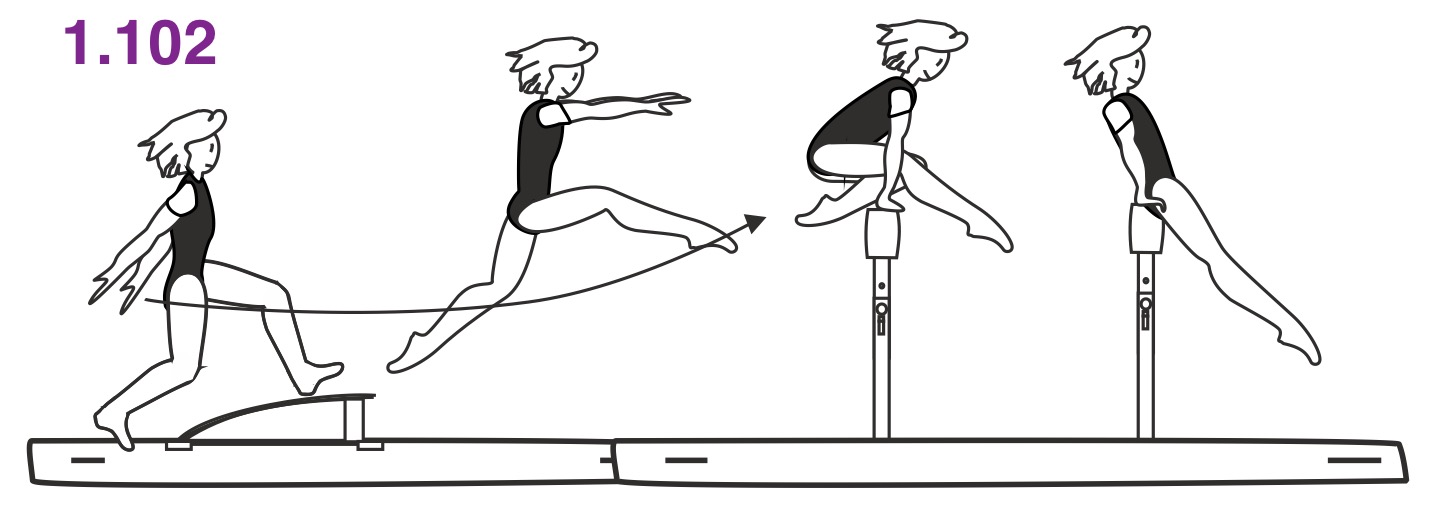 ) )
|
A |
Scissor leap over beam to cross sit on thigh (diagonal approach to
beam) (view ) )
|
|
| 1.302 (D) |
Straight jump with 1/2 twist to stand (view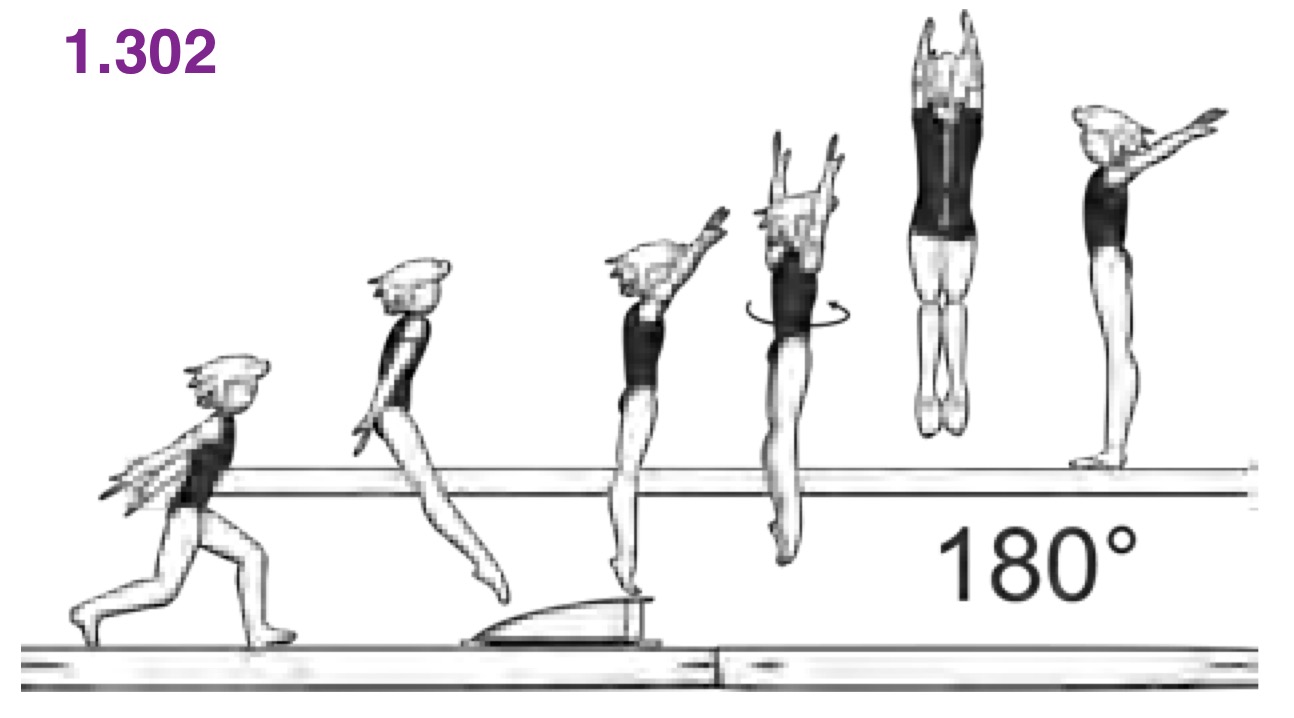 ) )
|
C |
|
| 1.402 (D) |
Straight jump with 1/1 twist to stand (view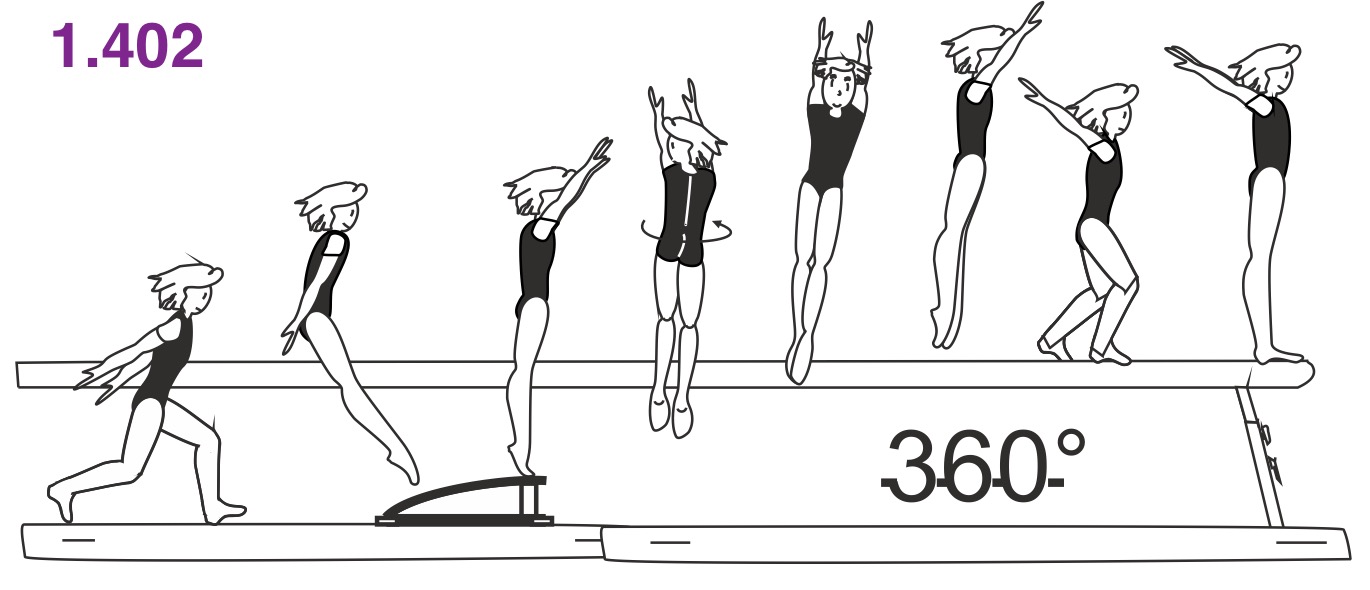 ) )
|
D |
|
| 1.103 (D) |
Flank to rear support (view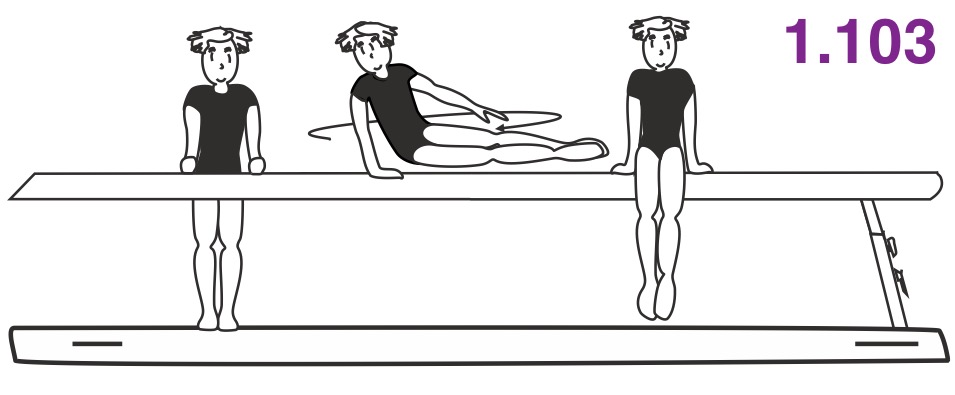 ) )
|
A |
Flank with 1/2 turn to rear support (view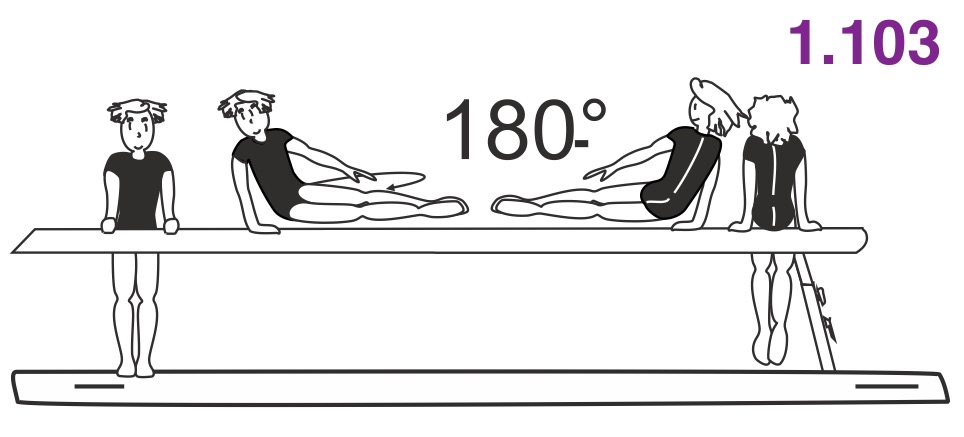 ) )
|
Jump with hand support, 3/4 turn in support to cross sit on thigh (view ) )
|
|
| 1.303 (D) |
Two flying flairs (view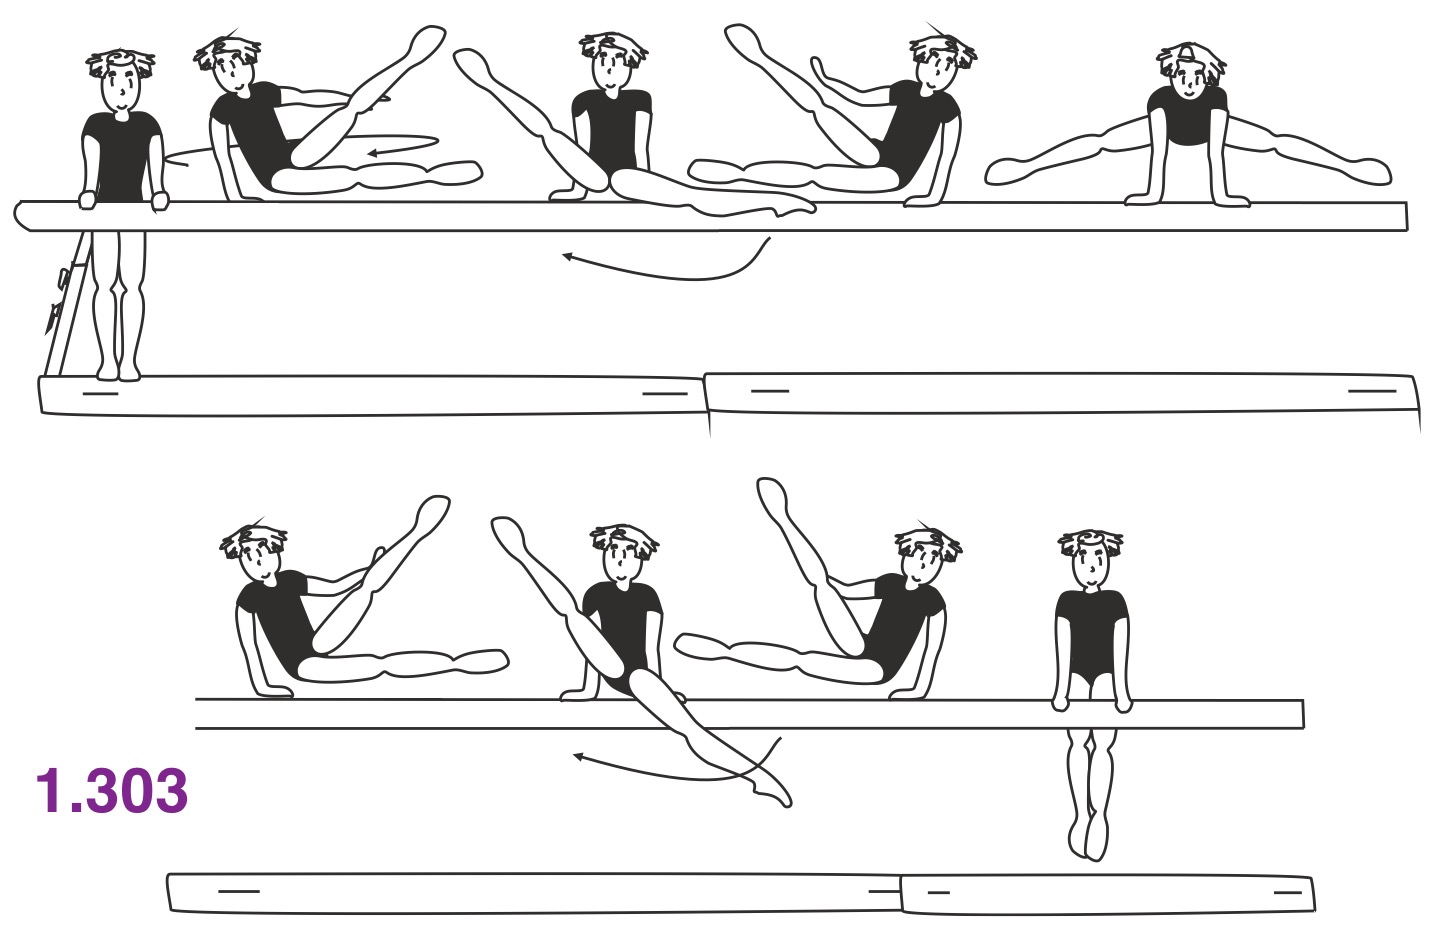 ) )
|
C |
|
| 1.403 (D) |
Homma: Three flying flairs (view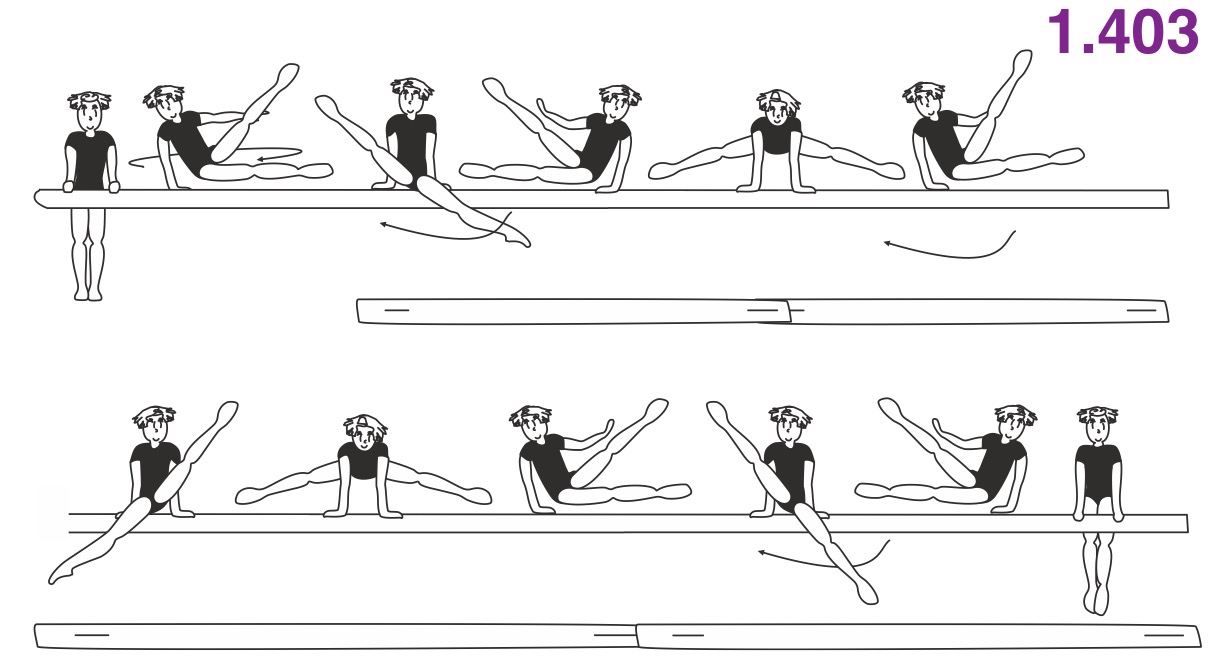 ) )
- Named After: Leah Homma, 1989 Worlds (watch)
|
D |
Baitova: two flank circles to flair (view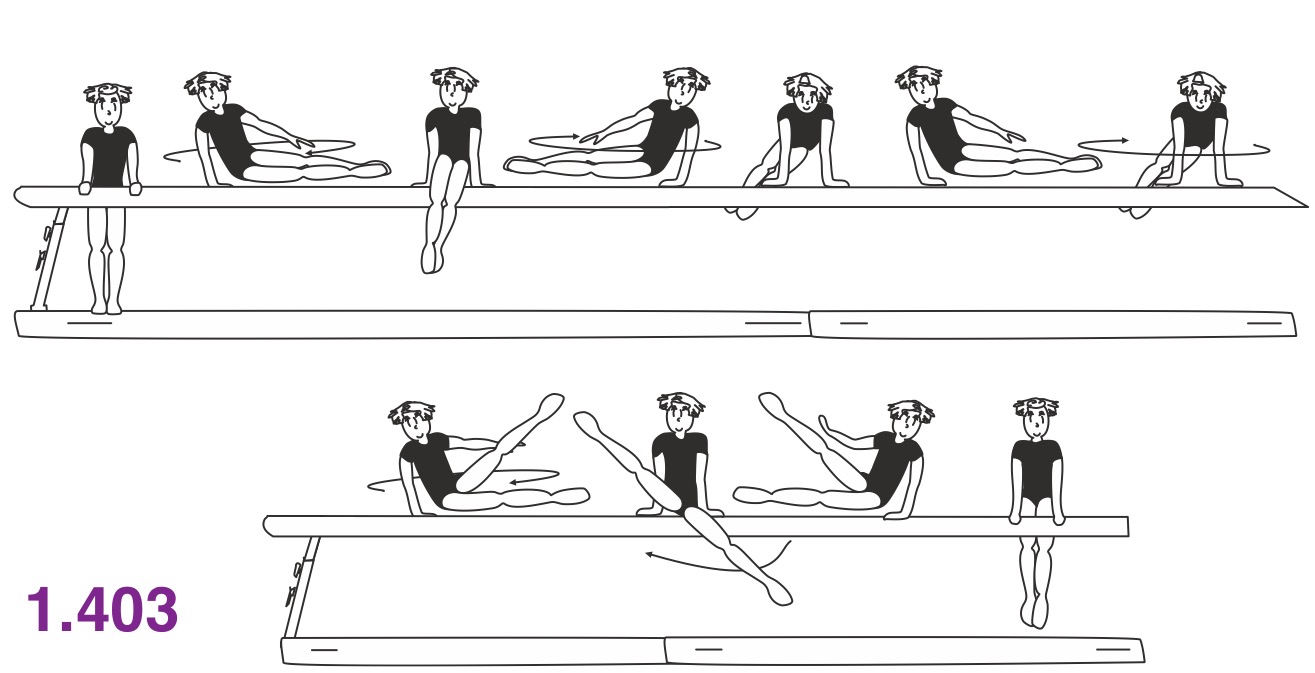 ) )
- Named After: Svetlana Baitova, 1987 Worlds (watch)
|
|
| 1.204 (D) |
Jump with 1/2 turn to clear straddle support (view ) )
|
B |
90° approach to beam: jump backward through straddle position over the
beam to front support or to side split (view ) )
|
|
| 1.304 (D) |
90° approach to beam: roundoff onto springboard, straddle pike jump backward over beam
to back hip circle (view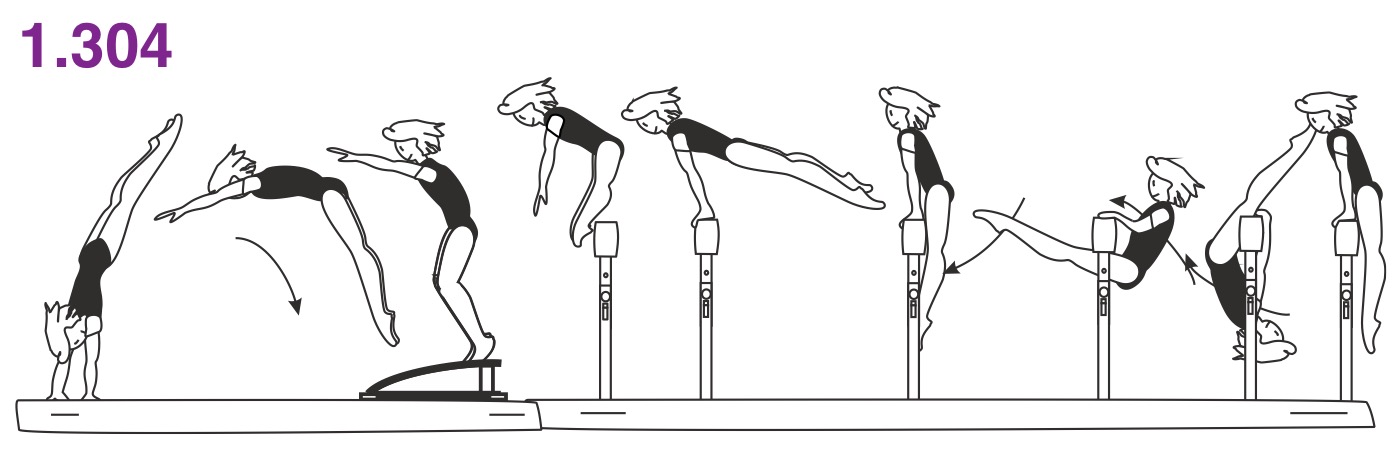 ) )
|
C |
|
| 1.105 (D) |
Jump with hand support to side split without hands touching the beam as final position (view ) )
|
A |
Jump with hand support to straddle split with trunk touching the beam (view ) )
|
Diagonal approach to beam: jump or leap (with hand support) to cross split sit (view ) )
|
|
| 1.305 (D) |
Diagonal approach to beam: free jump with take-off from two meet to cross split sit (view ) )
|
C |
Dick: diagonal approach to beam: change leg leap to free cross split
sit (view ) )
|
|
|